Perfect Python Environment
Introduction
The perfect python environment is a subjective term. It depends on what you are working on. If you are working on data science, you might need jupyter lab. If you are working on web development, you might need Django. If you are working on a machine learning project, you might need PyTorch. But there are some tools that are universally useful. In this post, I will show you how to set up the perfect python environment for any project.
We’re going to revolve everything around a python package, because the code that we’re writing should be structured, tested, and documented. Having a python package and living in a virtual environment, will be the best way to make our productivity thrive.

Pre-requisites
Before we get started, you need to have the following installed on your system:
- bash
- curl (
apt install update & apt install curl) - git
- unix based system (macOS, Linux, WSL)
If you are on Windows, use WSL. If you are on macOS, you can use the mac specific commands.
TLDR
- UV
- VS Code
- Copilot
- Linting formatting: RUFF
- jupyter lab / ipython (for data science)
- marimo
- git
- VS Code debugger
- dotenv
- pytest
- coverage
- sphinx
- pre-commit
Step by Step with explanation
1. UV
Let starts by creating a directory for the work that we’re going to do. This could be developing a web app, creating a machine learning model or printing “Hello World” to the console. We’re going to call this directory mypackage. Pun intended.
mkdir mypackage
cd mypackage
Now mypackage is going to be awesome, and of course it’s going to be python. If you’re working with python, you’re going to need a virtual environment, because there a bagilion versions of python available and you want to make sure you’re using the right one. There are almost as many virtual environment handlers as there are versions of python. Historically we had pyenv, conda, virtualenv, poetry and more. But now we have a new kid on the block called uv.
uv is developed by astral-sh, it’s written in rust and it’s blazing fast. The only risk of using uv is that the creators will figure out how great it is and they will start to charge us for it. You can install it with the following command:
curl -LsSf https://astral.sh/uv/install.sh | sh

source $HOME/.local/bin/env

uv --version
Now that we have uv we can create a virtual environment within our package directory.
uv venv  # creates a virtual environment in the .venv directory
uv init --name mypackage --lib  # initializes the package
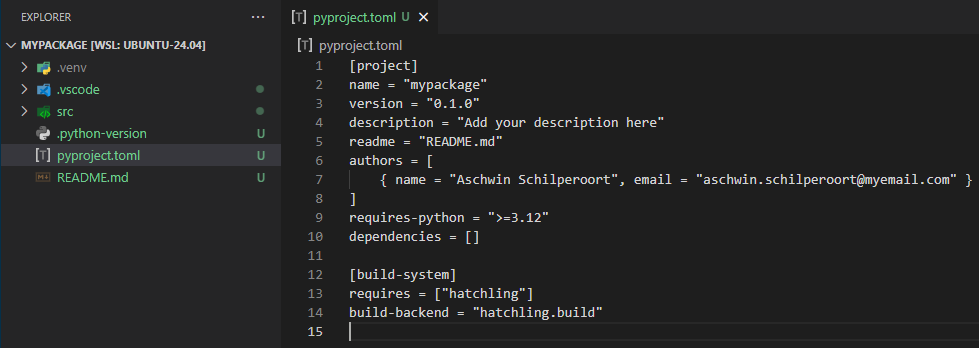
This creates a .venv directory in our package directory. This is where everything about your python environment will reside. uv will also create a pyproject.toml, a README.md, a .git directory, a .python-version and a src directory.

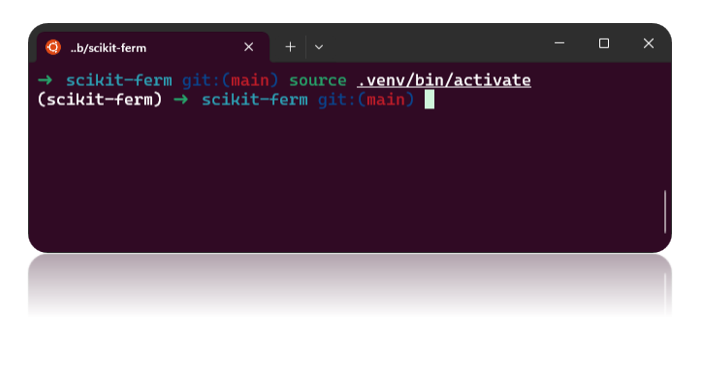
Let’s activate the virtual environment.
source .venv/bin/activate
Now you’re in the virtual environment. You can tell by the (mypackage) in front of your prompt. Let’s install our package.
uv sync
We can check that our package is installed by running the following:
python
>>> import mypackage
We can import our package, but it doesn’t have anything installed yet. Let create a module called mymodule and add a function called my_awesome_function that prints “Hello World!”.
touch src/mypackage/mymodule.py

echo "def my_awesome_function():
    print('Hello World!')" > src/mypackage/mymodule.py
Now mypackage has a module called mymodule with a function called my_awesome_function.
2. VS Code
Now that we have our package set up, we need an editor to write our code in. I recommend Visual Studio Code. You can install it by going to the download page and following the instructions.
Once install we can run VS Code from the terminal by running the following command:
exec $SHELL -l  # restarts the shell
code .
This will open VS Code in the current directory. Which is still our mypackage directory (hopefully).
This tutorial is not about how to use VS Code, but I will show you some extensions that I recommend you install.
- Python
- Git History / GitLens / Git Graph (pick your favorite)
- Remote - SSH
- VS Code-icons
- WSL (if you’re on WSL)
- Data Wrangler
- Docker
- Prettier
- Rainbow CSV
- Window Colors
- SQLite Viewer
- Github Copilot
There is pretty much an extension for everything you want. If there isn’t, you can always write your own.
3. Copilot
If you value your time, you should pay a measily $10 per month to save hours of debugging, suggesting code, writing docstrings, writing tests, and more. Copilot is a plugin for VS Code that uses OpenAI’s GPT-4o to help you write code. It’s like having a pair programmer that never sleeps, never eats, and never complains. You can install it by going to the copilot page and following the instructions.
Install it within you VS Code to maximize productivity!
4. Linting and Formatting
Linting and formatting are important. It makes your code more readable and it helps you catch bugs before they become a problem. I recommend using ruff.

Ruff comes preinstalled with uv. You can run it by running the following command:
uvx ruff check . --fix
uvx ruff format .
5. Jupyter Lab & ipython
Notebooks are great for data science, but they have the tendency to get a bit cluttered. Also tracking them in source control can be a bit of a pain. The good part about mypackage is that you can import it in Jupyter Notebooks and use it as you would any other package. You can install Jupyter Lab by running the following commands:
# make sure you're in the virtual environment (.venv)
uv pip install jupyterlab

mkdir notebooks

# start jupyter lab
jupyter lab
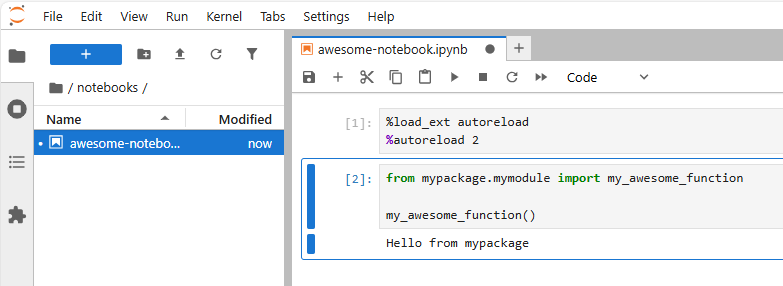
It’s good practice to keep your notebooks in a separate directory (notebooks) from your package. Another good practice is to keep your notebooks clean and to move classes and functions to a python module in your package. This way you can test your code and make sure it’s working as expected. You can also use Copilot to help you write code, because that’s not available in JupyterLab (yet). You can also run Jupyter Notebooks in VS Code.
Try running the following in a notebook:
%load_ext autoreload
%autoreload 2

from mypackage.mymodule import my_awesome_function
my_awesome_function()

6. Marimo
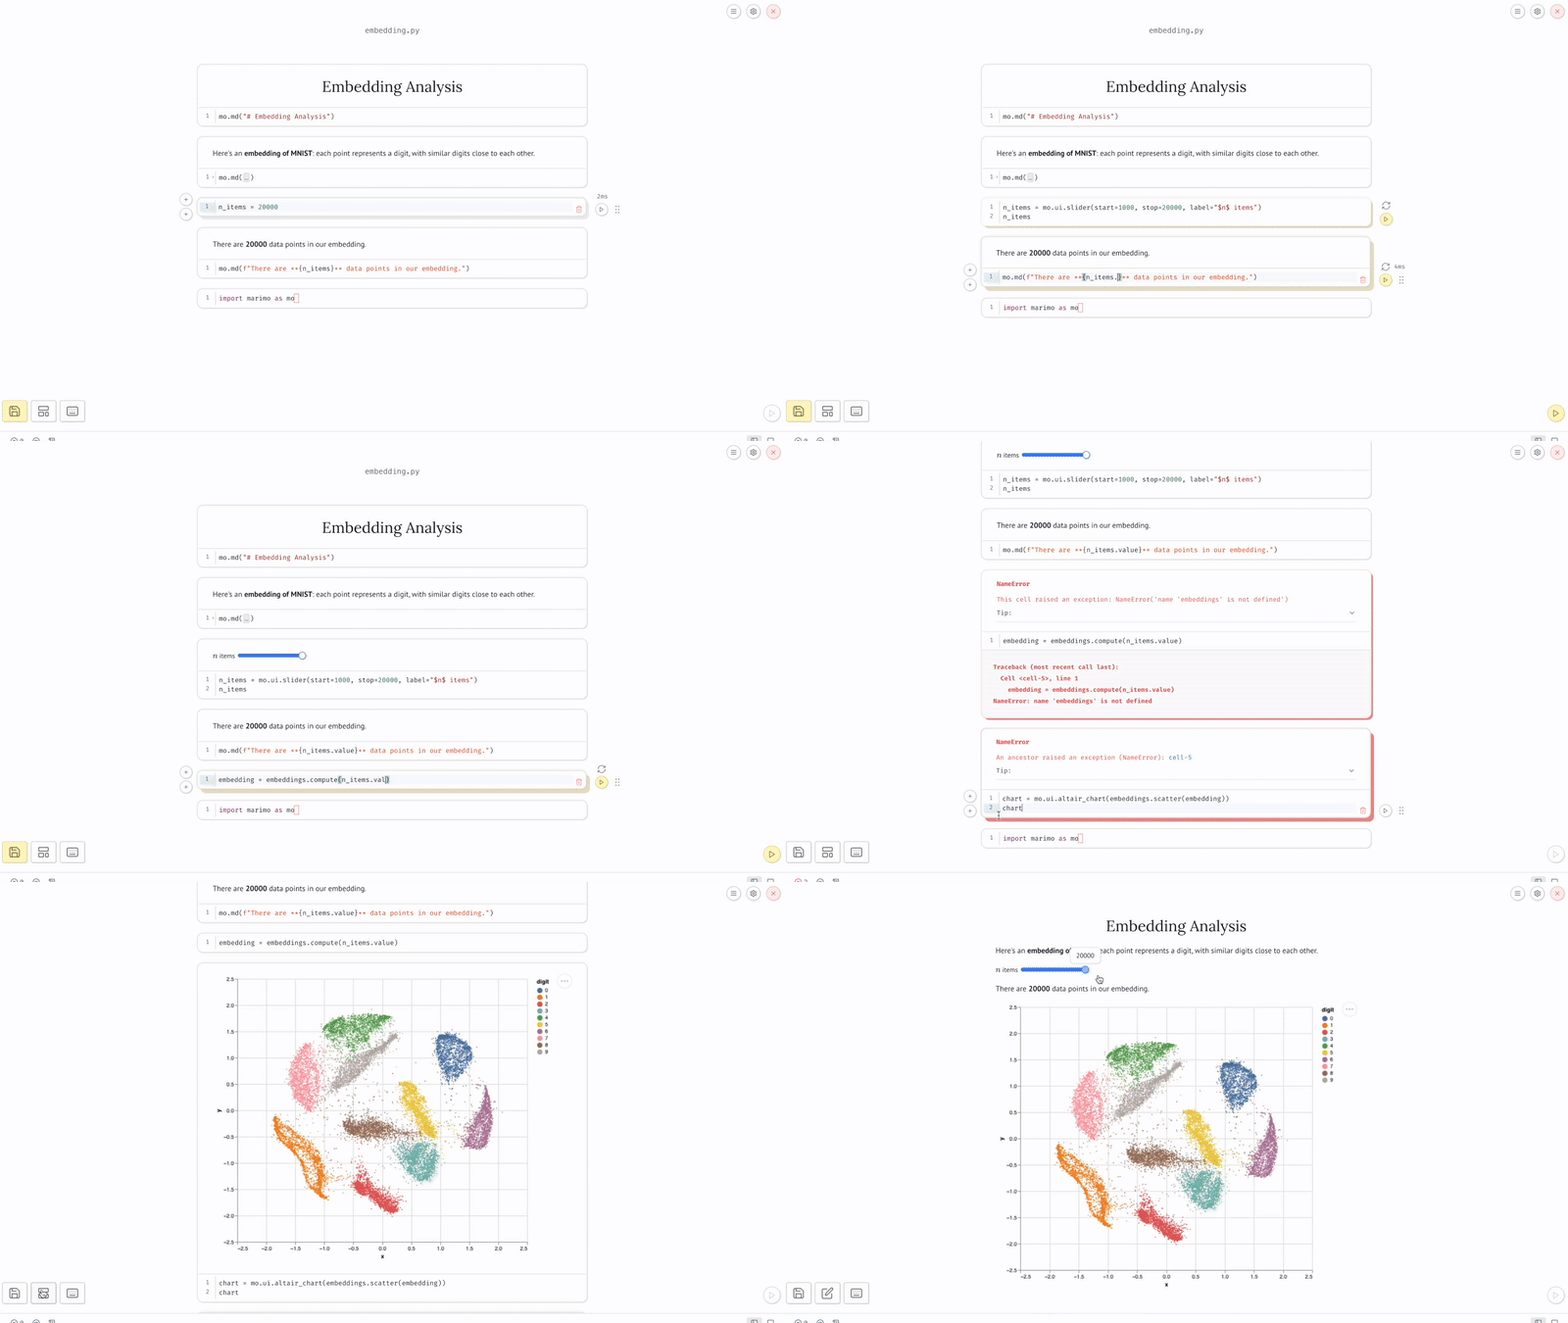
Marimo is an open-source reactive notebook. It’s the next generation of python notebooks. You can check it out here. What I love about marimo is that it’s reactive. You can write code in one cell and use the output in another cell. It’s like having a spreadsheet, but with python code.
You can also configure UI elements to interact with your code. You can create sliders, buttons, and text fields to change the input of your code. You can create a GUI for your code, which is great for exploratory data analysis (EDA) and for creating a simple dashboard.

7. Git
You should be using git. Period.
8. VS Code Debugger
Now this is very usefull when developing python modules. If you have a script that you want to debug, you can use the VS Code debugger. You can set breakpoints, step through your code, and inspect variables. You can also use the debugger in Jupyter Notebooks.
Set breakpoints in your scripts, so you are able to see the exact status of all your variables at that point in your code. You can then use the DEBUG CONSOLE to run parts of your code to find the error.
9. Dotenv
Within your python development environment there are certain things you want to keep secret. Like API keys, passwords, and other sensitive information. You can use a .env file to store these secrets. You can use the python-dotenv package to load these secrets into your environment variables. You can install it by running the following command:
uv pip install python-dotenv
You can create a .env file in the root of your package directory and add your secrets to it.
SECRET_KEY=youllneverguess
You can load these secrets into your environment variables by running the following command:
from dotenv import load_dotenv
load_dotenv()

import os
print(os.getenv('SECRET_KEY'))
10. Pytest
Code without tests is like a car without brakes. You can drive it, but you’re going to crash. You can write tests for your code using the pytest package. You can install it by running the following command:
uv pip install pytest
You can write tests for your code by creating a tests directory in the root of your package directory. You can create a test file called test_mymodule.py and write tests for your code. You can run the tests by running the following command:
def test_my_awesome_function():
    assert my_awesome_function() == 'Hello World!'
pytest
11. Pyright
Pyright is a fast type checker for Python, developed by Microsoft.
- Static type checker → Catches type errors without running code.
- Works with Type Hints → Uses Python’s
typingmodule. - Faster than mypy → Built for speed and scalability.
- VS Code support → Integrated with Pylance for real-time feedback.
- CLI & Editor → Runs in terminal or as an extension.
- Strict mode available → Enforces stronger type checking.
- Use it to catch bugs early, improve code quality, and enforce type safety.
Install it with
uv pip install pyright
Run it with
pyright
12. Coverage
The coverage Python package is a tool used to measure how much of your Python code is executed during testing. It helps identify untested parts of your codebase, ensuring better test coverage and improving software quality.
uv pip install coverage
You can run the coverage report by running the following command:
coverage run -m pytest
coverage report
Using coverage regularly helps catch hidden bugs and ensures that your tests fully validate your code. It’s like a spellchecker for your testing—highlighting what you’ve missed and helping you write more reliable software.
13. Sphinx
Sphinx is a Python documentation generator that allows developers to create well-structured, professional-looking documentation for their projects. It was originally developed for documenting Python itself but is now widely used across many open-source and commercial projects.
uv pip install sphinx
You can generate the documentation by running the following command:
sphinx-quickstart
You can configure the documentation by answering the questions that are asked. You can generate the documentation by running the following command:
sphinx-build -b html docs docs/_build
You can view the documentation by opening the docs/_build/index.html file in your browser.
14. Pre-commit
The pre-commit Python package is a framework for managing and running git pre-commit hooks. It allows developers to automate checks and fixes before committing code, ensuring better code quality and consistency across a team.
uv pip install pre-commit
You can configure the checks by creating a .pre-commit-config.yaml file in the root of your package directory. A good starting point is to use the pre-commit-hooks package, which provides a set of common hooks for linting and formatting code. Of course there are many more hooks available for different use cases. Some good hooks to check out would be ruff, pyright, isort, prettier.
repos:
  - repo: https://github.com/pre-commit/pre-commit-hooks
    rev: v4.4.0 # Use the latest stable version
    hooks:
      - id: trailing-whitespace
      - id: end-of-file-fixer
      - id: check-yaml
Install the hooks
pre-commit install
Run the hooks
pre-commit run --all-files
The hooks will also automatically run before each commit, ensuring that your code meets the defined standards.
Conclusion
This is the perfect python environment. It’s a bit of work to set up, but it’s worth it. You can use this environment for any project that you’re working on. It will make your code more structured, more tested, and more documented. It will make your productivity thrive. And that’s what we all want, right?